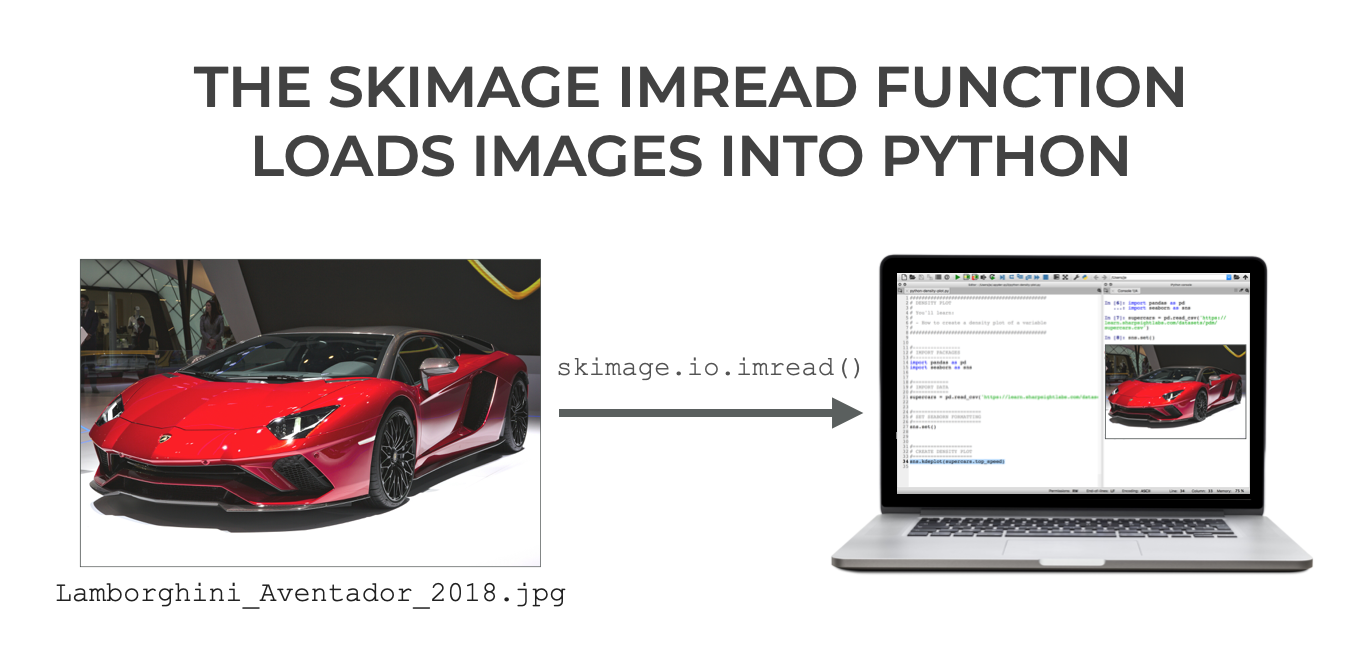
In this tutorial, I’ll show you how to use the Skimage imread function to load images into Python.
So I’ll explain the syntax of skimage.io.imread. I’ll also show you a clear, step-by-step example of how to use the function to load an image from a file.
The tutorial has several sections, and if you need something specific, you can click on the appropriate link.
Table of Contents:
Ok. Let’s get started.
A Quick Introduction to the Skimage imread Function
If you’re doing image processing in Python, then of of the first things you’ll need to do is load the image into your programming environment.
In Python, there are several toolkits that can help you do this. But if you’re doing your image processing in the context of data science and machine learning, one of the best toolkits to do this is the Skimage package.
Specifically, you can use the Skimage imread function to read images in from files on your computer, to a form usable in a Python program.
The skimage imread function is pretty simple to use, but to use it properly, you need to understand the syntax.
That being the case, let’s take a look at the syntax of the function.
The syntax of skimage.io.imread
Now that I’ve given you a high-level overview of what the imread function does, let’s take a look at the syntax.
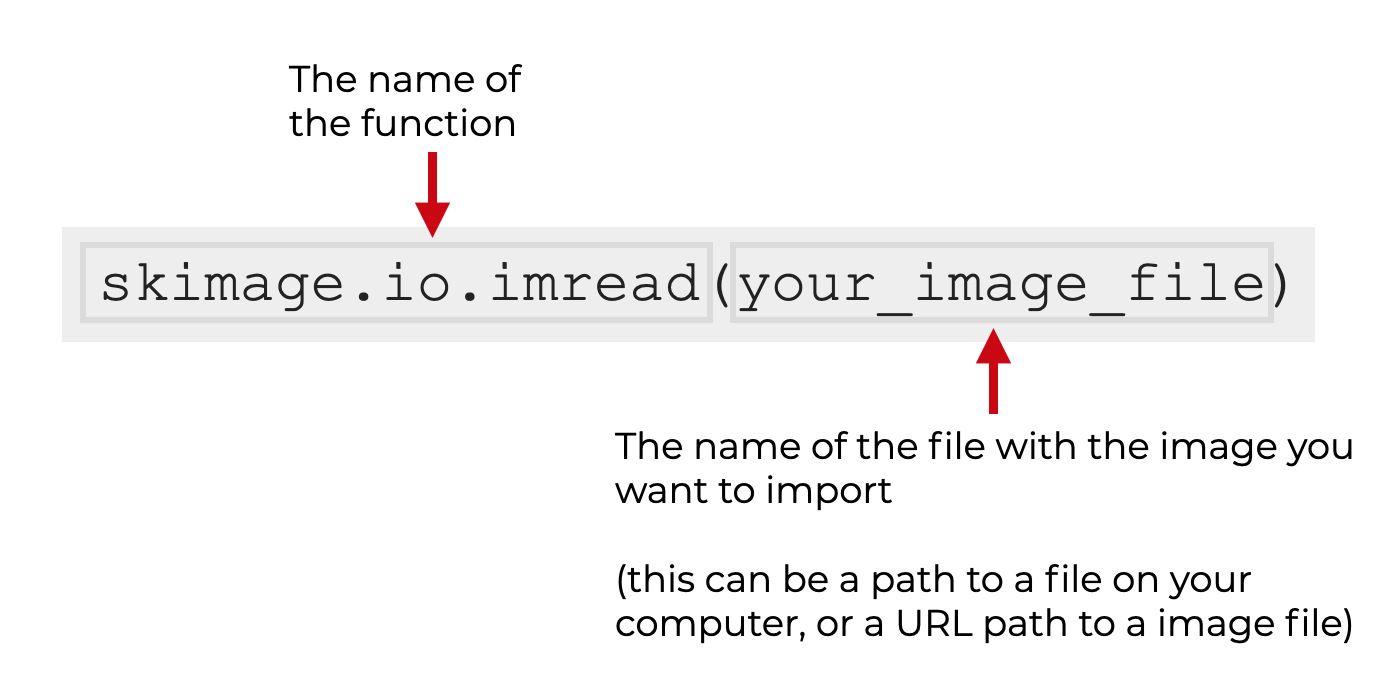
The imread function is part of the skimage.io namespace. So we can call the function as skimage.io.imread().
Let’s quickly discuss some of the details of the function.
Input to skimage.io.imread
In the syntax explanation above, you’ll notice an input inside the parenthesis.
In that explanation, I’ve called the input “your_image_file“.
In terms of format, this should be an image file like a jpg file.
More specifically, you should present the name of the file as a string, including the whole path to the image file.
So for example, if your file is named Lamborghini_Aventador_2018.jpg, and the image is in a folder on your computer, /documents/images/, then you could call the function as:
skimage.io.imread('/documents/images/Lamborghini_Aventador_2018.jpg')
Notice that the full path and name of the file are enclosed inside quotes.
If the file lives at a URL on the internet, you can also provide the full URL path and file name (enclosed inside quotations). It will work that way too. I’ll show you an example of this in the examples section.
Additional parameters
The function also has a few optional parameters that you can use to modify how the function behaves.
as_gray
The as_gray parameter enables you to convert images to grascale.
The argument to this parameters will be a True or False boolean values.
If as_gray = True, it will convert the image to grayscale.
This parameter is optional.
Images that are already in grayscale will be unaffected by use of this parameter.
plugin
The plugin parameter enables you to specify a plugin to use.
We will not cover the use of this parameter in this tutorial.
The output of skimage.io.imread
The output of skimage.io.imread is a Numpy array.
The dimensions of the output depend on the color scheme used in the image.
If the image is grayscale, then the output will be an M x N array (M rows and N columns).
If the image uses RGB colors, then the output will be M x N x 3. This third dimension will contain the RGB color channel data.
If the image uses RGBA colors, then the output will be M x N x 4. This third dimension will contain the RGBA color channel data.
If you’re confused about Numpy arrays, you should consider enrolling in our course, Numpy Mastery. It explains everything that you need to know about Numpy.
Examples: how to import images with Skimage imread
Now that we’ve looked at the syntax of sklearn.io.imread, let’s look at some examples of how to import images into Python.
Examples:
Run this code first
Before you run the examples, you’ll need to import some packages and run some preliminary code.
Import packages
First we need to import a few Python packages.
import plotly.express as px
import skimage.io
We obviously need skimage to run the sklearn.io.imread function.
We’ll also use plotly.express to actually visualize the image once we have it loaded.
If you don’t have these packages on your computer, then you’ll need to install them first.
These days, I install almost all of my Python packages via Anaconda. You can get more information about installing skimage via Anaconda here. And you can get information about installing Plotly here.
Set Up Image Rendering
By default, Plotly is set up to render images in browser windows.
So, if you’re using an IDE (Integrated Development Environment) like Spyder, you’ll need to set it up to render plots from Plotly. (I use Spyder, so I need to do this step myself.)
Note: if you’re using Jupyter, you can skip this code!
To set up Plotly to render your plots directly in your IDE, you can run the following code:
import plotly.io as pio
pio.renderers.default = 'svg'
EXAMPLE 1: Load an image with sklearn.io.imread
Here, we’re going to load an image file with Skimage imread, and we’ll plot it with Plotly.
The file is in a folder at https://www.sharpsightlabs.com/datasets/images/.
Here’s the code to read it in:
skimage.io.imread('https://www.sharpsightlabs.com/datasets/images/Lamborghini_Aventador_2018.jpg')
OUT:
array([[[ 59,  58,  54],
        [ 56,  58,  55],
        [ 56,  58,  55],
        ...,
        [ 36,  37,  39],
        [ 35,  39,  38],
        [ 31,  37,  33]],

       [[ 56,  57,  51],
        [ 55,  56,  51],
        [ 53,  53,  51],
        ...,
        [ 39,  41,  38],
        [ 39,  41,  38],
        [ 36,  41,  35]],

       [[ 54,  55,  50],
        [ 54,  55,  50],
        [ 55,  55,  53],
        ...,
        [ 35,  40,  34],
        [ 39,  41,  36],
        [ 39,  41,  36]],

       ...,

       [[255, 255, 255],
        [255, 255, 255],
        [255, 255, 255],
        ...,
        [251, 244, 252],
        [247, 241, 251],
        [247, 244, 253]],

       [[255, 255, 255],
        [255, 255, 255],
        [255, 255, 255],
        ...,
        [250, 242, 253],
        [248, 242, 252],
        [247, 246, 254]],

       [[255, 255, 255],
        [255, 255, 255],
        [255, 255, 255],
        ...,
        [249, 241, 252],
        [249, 243, 253],
        [248, 247, 255]]], dtype=uint8)
Explanation
Here, we’ve loaded the file named Lamborghini_Aventador_2018.jpg. This file lives at the URL https://www.sharpsightlabs.com/datasets/images/.
So to load the file, we called the function, and the argument to the function is the full URL path and file name, enclosed in quotation marks.
The output is a multi dimensional Numpy array.
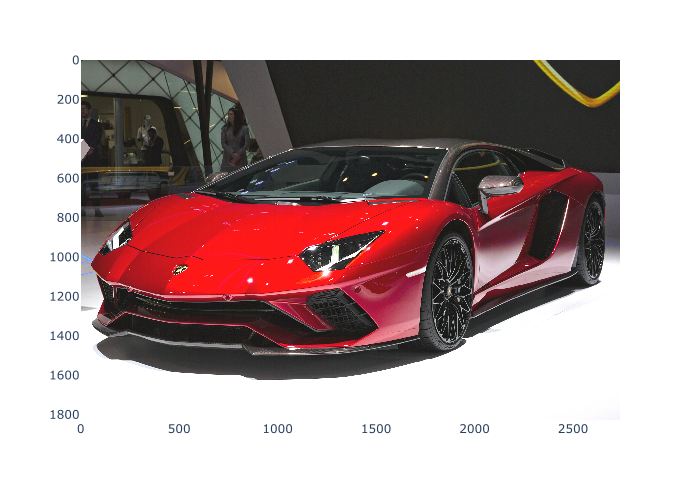
We can visualize this array by using the Plotly imshow function. Let’s re-run the code slightly to do that:
aventador = skimage.io.imread('https://www.sharpsightlabs.com/datasets/images/Lamborghini_Aventador_2018.jpg')

px.imshow(aventador)
OUT:
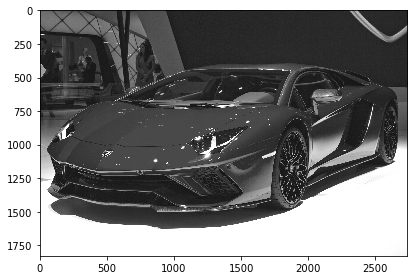
EXAMPLE 2: Import an image as a grayscale image
Now, we’ll import the image file as a grayscale image, and plot it.
To do this, we’ll set as_gray = True.
Additionally, to plot the grayscale image, we’ll use skimage.io.imshow this time.
Let’s take a look:
aventador_gray = skimage.io.imread('https://www.sharpsightlabs.com/datasets/images/Lamborghini_Aventador_2018.jpg', as_gray = True)
skimage.io.imshow(aventador_gray)
OUT:
Explanation
Here, to import this image as a grayscale image, we’ve used skimage.io.imread, and we’ve set as_gray = True.
This is pretty simple. There’s not much to it.
Leave your other questions in the comments below
Do you still have questions about loading images with the Plotly read function?
If so, just leave your questions in the comments section below.
Quite revealing. Thanks
many thanks! really explained in a understandable way, even to a non technical and non english speaker, i hope more of them would follow on the net .
You’re welcome