One of the cornerstones of the Python data science ecosystem is NumPy, and the foundation of NumPy is the NumPy array.
That being the case, if you want to learn data science in Python, you’ll need to learn how to work with NumPy arrays.
In this blog post, I’ll explain the essentials of NumPy arrays, including:
- What NumPy arrays are
- How to create a NumPy array
- Attributes of NumPy arrays
- Retrieving individual values from NumPy arrays
- Slicing NumPy arrays
- Creating and working with 2-dimensional NumPy arrays
Let’s get started.
What is a NumPy array?
A NumPy array is a collection of elements that have the same data type.
You can think of it like a container that has several compartments that hold data, as long as the data is of the same data type.
Visually, we can represent a simple NumPy array sort of like this:
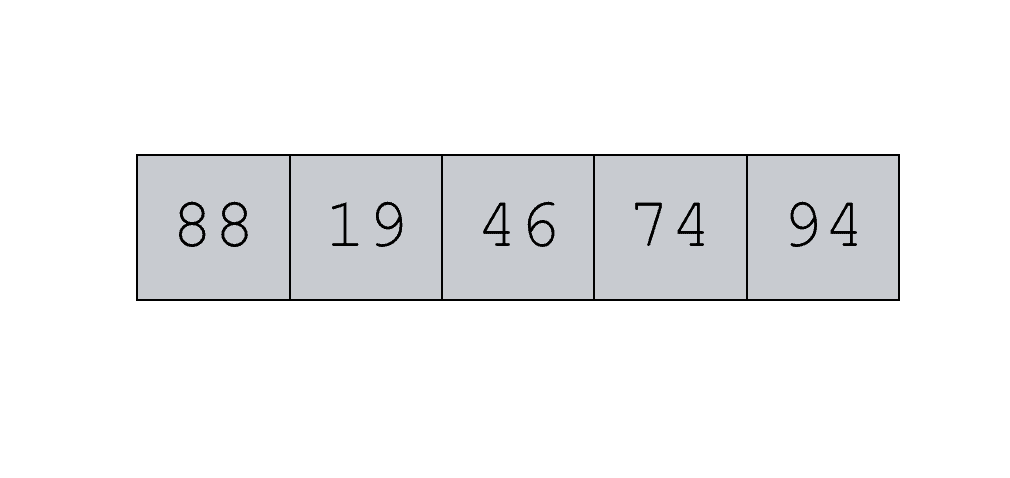
Let’s break this down.
We have a set of integers: 88, 19, 46, 74, 94. These values are all integers; they are all of the same type. You can see that these values are stored in “compartments” of a larger structure. The overall structure is the NumPy array.
Very quickly, I’ll explain a little more about some of the properties of a NumPy array.
NumPy arrays must contain data all of the same type
As I mentioned above, NumPy arrays must contain data all of the same type.
That means that if your NumPy array contains integers, all of the values must be integers. If it contains floating point numbers, all of the values must be floats.
I won’t write extensively about data types and NumPy data types here. There is a section below in this blog post about how to create a NumPy array of a particular type. Having said that, if you want to learn a lot more about the various data types that are available in NumPy, then (as the saying goes) read the f*cking manual.
NumPy arrays have an index
Each of the compartments inside of a NumPy array have an “address.” We call that address an “index.”
If you’re familiar with computing in general, and Python specifically, you’re probably familiar with indexes. Many data structures in Python have indexes, and the indexes of a NumPy array essentially work the same.
If you’re not familiar with indexes though, let me explain. Again, an index is sort of like an address. These indexes enable you to reference a specific value. We call this indexing.
Index values start at zero
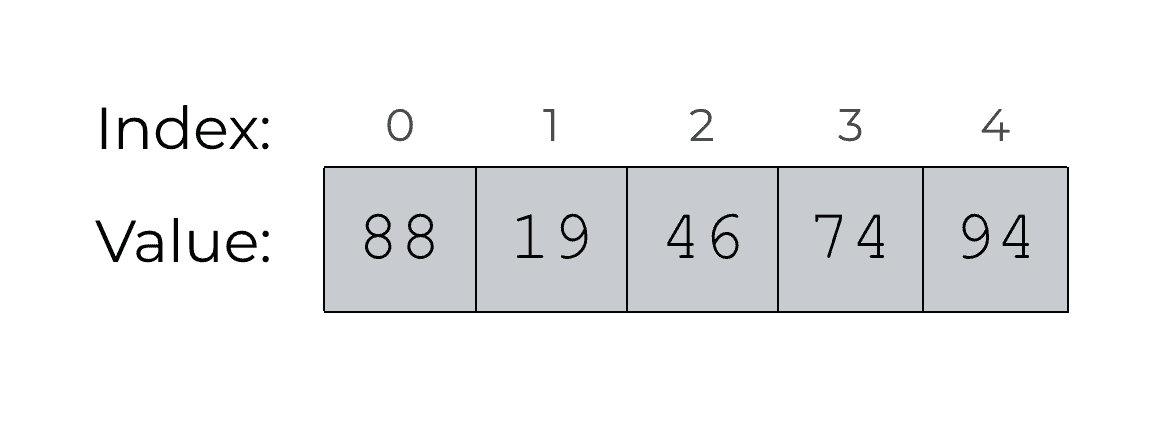
Just like other Python structures that have indexes, the indexes of a NumPy array begin at zero:
So if you want to reference the value in the very first location, you need to reference location “0”. In the example shown here, the value at index 0 is 88.
I’ll explain how exactly to use these indexes syntactically, but to do that, I want to give you working examples. To give you working examples, I’ll need to explain how to actually create NumPy arrays in Python.
How to create a NumPy array
There are a lot of ways to create a NumPy array. Really. A lot. Off the top of my head, I can think of at least a half dozen techniques and functions that will create a NumPy array. In fact, the purpose of many of the functions in the NumPy package is to create a NumPy array of one kind or another.
But, this blog posts is intended to be a quick introduction to NumPy arrays. That being the case, I don’t want to show you every possible way to make a NumPy array. Let’s keep this simple. I’ll show you a few very basic ways to do it.
In particular, I’ll how you how to use the NumPy array() function.
Creating NumPy arrays with the array() function
To use the NumPy array() function, you call the function and pass in a Python list as the argument.
Let’s take a look at some examples. We’ll start by creating a 1-dimensional NumPy array.
Create a 1 dimensional NumPy array
Creating a 1-dimensional NumPy array is easy.
You call the function with the syntax np.array(). Keep in mind that before you call np.array(), you need to import the NumPy package with the code import numpy as np.
When you call the array() function, you’ll need to provide a list of elements as the argument to the function.
#import NumPy
import numpy as np

# create a NumPy array from a list of 3 integers
np.array([1,2,3])
This isn’t complicated, but let’s break it down.
We’ve called the np.array() function. The argument to the function is a list of three integers: [1,2,3]. It produces a NumPy array of those three integers.
Note that you can also create NumPy arrays with other data types, besides integers. I’ll explain how to do that a little later in this blog post.
Create a 2 dimensional NumPy array
You can also create 2-dimensional arrays.
To do this using the np.array() function, you need to pass in a list of lists.
# 2-d array
np.array([[1,2,3],[4,5,6]])
Pay attention to what we’re doing here, syntactically.
Inside of the call to np.array(), there is a list of two lists: [[1,2,3],[4,5,6]]. The first list is [1,2,3] and the second list is [4,5,6]. Those two lists are contained inside of a larger list; a list of lists. Then that list of lists is passed to the array function, which creates a 2-dimensional NumPy array.
This might be a little confusing if you’re just getting started with Python and NumPy. In that case, I highly recommend that you review Python lists.
There are also other ways to create a 2-d NumPy array. For example, you can use the array() function to create a 1-dimensional NumPy array, and then use the reshape() method to reshape the 1-dimensional NumPy array into a 2-dimensional NumPy array.
# 2-d array
np.array([1,2,3,4,5,6]).reshape([2,3])
For right now, I don’t want to get too “in the weeds” explaining reshape(), so I’ll leave this as it is. I just want you to understand that there are a few ways to create 2-dimensional NumPy arrays.
I’ll write more about how to create and work with 2-dimensional NumPy arrays in a future blog post.
N-dimensional NumPy arrays
It’s also possible to create 3-dimensional NumPy arrays and N-dimensional NumPy arrays. However, in the interest of simplicity, I’m not going to explain how to create those in this blog post. I’ll address N-dimensional NumPy arrays in a future blog post.
Create a NumPy array with a specific datatype
Using the NumPy array() function, we can also create NumPy arrays with specific data types. Remember that in a NumPy array, all of the elements must be of the same type.
To do this, we need to use the dtype parameter inside of the array() function.
Here are a couple of examples:
integer
To create a NumPy array with integers, we can use the code dtype = 'int'.
np.array([1,2,3], dtype = 'int')
float
Similarly, to create a NumPy array with floating point number, we can use the code dtype = 'float'.
np.array([1,2,3], dtype = 'float')
These are just a couple of examples. Keep in mind that NumPy supports almost 2 dozen data types … many more than what I’ve shown you here.
Having said that, a full explanation of Python data types and NumPy data types is beyond the scope of this post. Just understand that you can specify the data type using the dtype parameter.
For more information on data types in NumPy, consult the documentation about the NumPy types that are available.
Common mistakes when creating a NumPy array
I want to point out one common mistake that many beginners make when they try to create a NumPy array with the np.array() function.
As I mentioned above, when you create a NumPy array with np.array(), you need to provide a list of values.
Many beginners forget to do this and simply provide the values directly to the np.array() function, without enclosing them inside of a list. If you attempt to do that it will cause an error:
np.array([1,2,3,4,5]) #This works!
np.array(1,2,3,4,5) #This will cause an error
In the two examples above, pay close attention to the syntax. The top example works properly because the integers are contained inside of a Python list. The second example causes an error because the integers are passed directly to np.array(), without enclosing them in a list.
Having said that, pay attention! Make sure that when you use np.array(), you’re passing the values as a list.
Again, if you’re confused about this or don’t understand Python lists, I strongly recommend that you go back and review lists and other basic “built-in types” in Python.
Attributes of a NumPy array
NumPy arrays have a set of attributes that you can access. These attributes include things like the array’s size, shape, number of dimensions, and data type.
Here’s an abbreviated list of attributes of NumPy arrays:
| Attribute | What it records |
|---|---|
shape |
The dimensions of the NumPy array |
size |
The total number of elements in the NumPy array |
ndim |
The number of dimensions of the array |
dtype |
The data type of the elements in the array |
itemsize |
The length of a single array element in bytes |
I want to show you a few of these. To illustrate them, let’s make a NumPy array and then investigate a few of its attributes.
Here, we’ll once again create a simple NumPy array using np.random.randint().
np.random.seed(72)
simple_array = np.random.randint(low = 0, high = 100, size=5)
simple_array is a NumPy array, and like all NumPy arrays, it has attributes.
You can access those attributes by using a dot after the name of the array, followed by the attribute you want to retrieve.
Here are some examples:
ndim
ndim is the number of dimensions.
simple_array.ndim
Which produces the output:
1
What this means is that simple_array is a 1-dimensional array.
shape
The shape attribute tells us the number of elements along each dimension.
simple_array.shape
With the output:
(5,)
What this is telling us is that simple_array has 5 elements along the first axis. (And that’s the only information provided, because simple_array is 1-dimensional.)
size
The size attribute tells you the total number of elements in a NumPy array.
simple_array.size
With the output:
5
This is telling us that simple_array has 5 total elements.
dtype (i.e., data type)
dtype tells you the type of data stored in the NumPy array.
Let’s take a look. We can access the dtype parameter like this:
simple_array.dtype
Which produces the output:
dtype('int64')
This is telling us that simple_array contains integers.
Also remember: NumPy arrays contain data that are all of the same type.
Although we constructed simple_array to contain integers, but we could have created an array with floats or other numeric data types.
For example, we can create a NumPy array with decimal values (i.e., floats):
array_float = np.array([1.99,2.99,3.99] )
array_float.dtype
Which gives the output:
dtype('float64')
When we construct the array with the above input values, you can see that array_float contains data of the float64 datatype (i.e., numbers with decimals).
Now that I’ve explained attributes, let’s examine how to index NumPy arrays.
Indexing NumPy arrays
Indexing is very important for accessing and retrieving the elements of a NumPy array.
Recall what I wrote at the beginning of the blog post:
A NumPy array is like a container with many compartments. Each of the compartments inside of a NumPy array have an “address.” We call that address an “index.”
Notice again that the index of the first value is 0.
We can use the index to retrieve specific values in the NumPy array. Let’s take a look at how to do that.
First, let’s create a NumPy array using the function np.random.randint().
np.random.seed(72)
simple_array = np.random.randint(low = 0, high = 100, size=5)
You can print out the array with the following code:
print(simple_array)
And you can see that the array has 5 integers.
[88, 19, 46, 74, 94]
For the sake of clarity tough, here’s a visual representation of simple_array. Looking at this will help you understand array indexing:
In this visual representation, you can see the values stored in the array, 88, 19, 46, 74, 94. But, I’ve also shown you the index values associated with each of those elements.
These indexes enable us to retrieve values in specific locations.
Let’s take a look at how to do that.
Indexing a single element
The simplest form of indexing is retrieving a single value from the array.
To retrieve a single value from particular location in the NumPy array, you need to provide the “index” of that location.
Syntactically, you need to use bracket notation and provide the index inside of the brackets.
Let me show you an example. Above, we created the NumPy array simple_array.
To get the value at index 1 from simple_array, you can use the following syntax:
# Retrieve the value at index 1
simple_array[1]
Which returns the value 19.
Visually though, we can represent this indexing action like this:
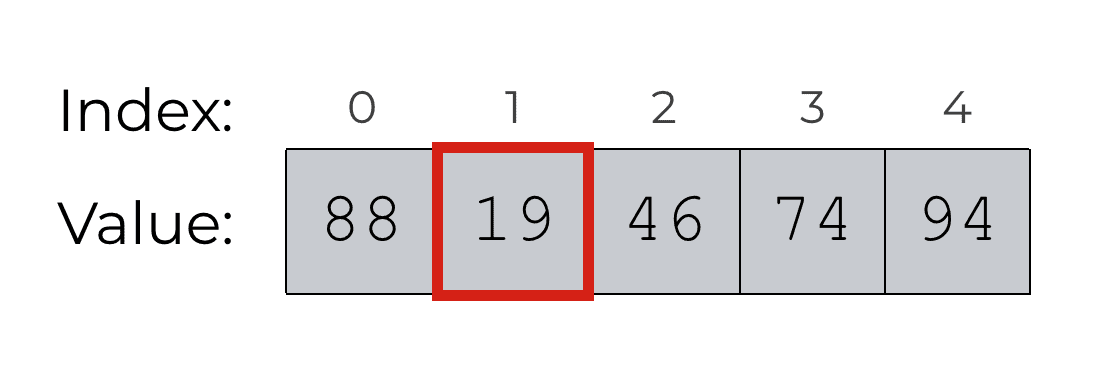
Essentially, we’re using a particular index (i.e., the “address” of a particular location in the array) to retrieve the value stored at that location.
So the code simple_array[1] is basically saying, “give me the value that’s at index location 1.” The result is 19 … 19 is the value at that index.
Negative index values
NumPy also supports negative index values. Using a negative index allows you to retrieve or reference locations starting from the end of the array.
Here’s an example:
simple_array[-1]
This retrieves the value at the very end of the array.
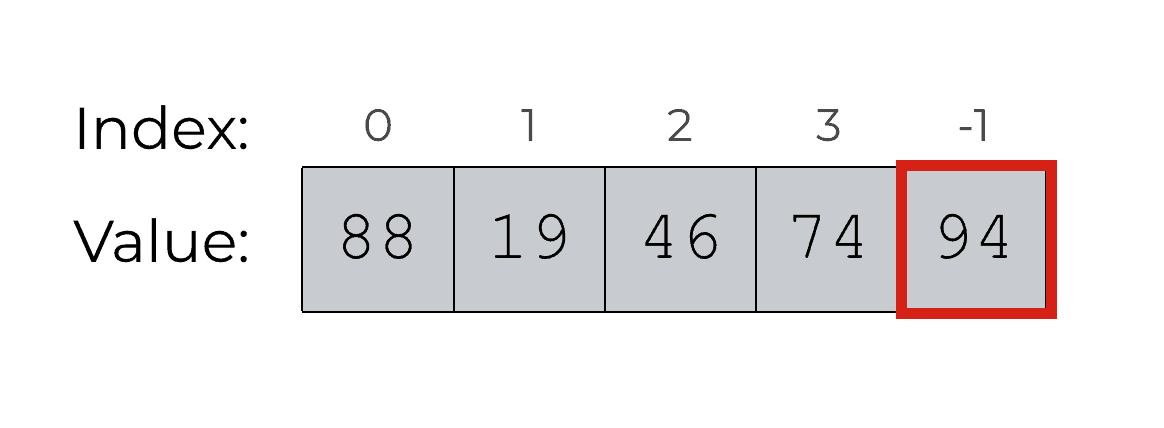
We could also retrieve this value by using the index 4 (both will work). But sometimes you won’t know exactly how long the array is. This is a convenient way to reference items at the end of a NumPy array.
Indexing multiple elements: AKA array slicing
I just showed you simple examples of array indexing, but array indexing can be quite complex.
It’s actually possible to retrieve multiple elements from a NumPy array.
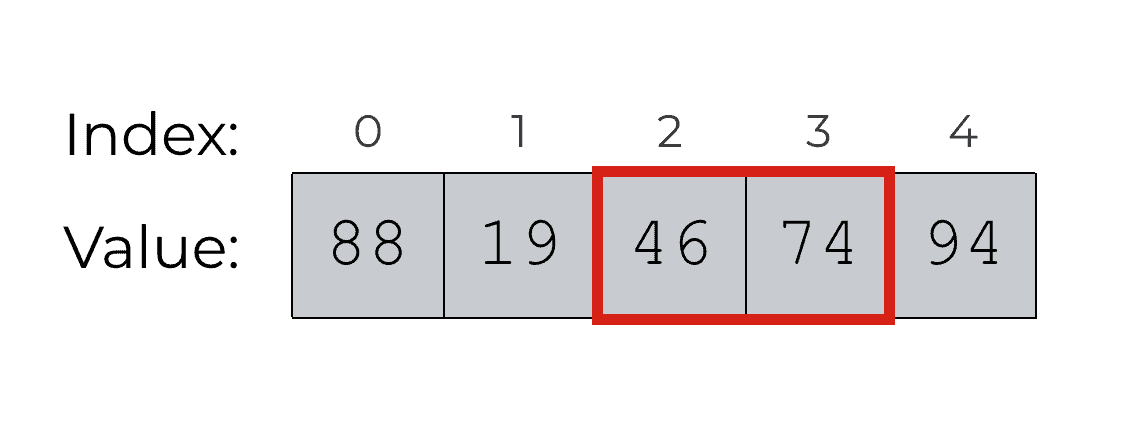
To do this, we still use bracket notation, but we can use a colon to specify a range of values. Here’s an example:
simple_array[2:4]
This code is saying, “retrieve the values stored from index 2, up to but excluding index 4.”
Visually, we can represent this as follows:
Indexing in 2-dimensional NumPy arrays
Now that you’ve learned how to use indexes in 1-dimensional NumPy arrays, lets review how to use indexes in 2-dimensional NumPy arrays.
Working with 2-d NumPy arrays is very similar to working with 1-d arrays. The major difference (with regard to indexes) is that 2-d arrays have 2 indexes, a row index and a column index.
To retrieve a value from a 2-d array, you need to provide the specific row and column indexes.
Here’s an example. We’ll create a 2-d NumPy array, and then we’ll retrieve a value.
np.random.seed(72)
square_array = np.random.randint(low = 0, high = 100, size = 25).reshape([5,5])

square_array[2,1]

Here, we’re essentially retrieving the value at row index 2 and column index 1. The value at that position is 45.
This is fairly straightforward. The major challenge is that you need to remember that the row index is first and the column index is second.
Slicing 2-d NumPy arrays
Finally, let’s review how to retrieve slices from 2-d NumPy arrays. Slicing 2-d arrays is very similar to slicing 1-d arrays. The major difference is that you need to provide 2 ranges, one for the rows and one for the columns.
np.random.seed(72)
square_array = np.random.randint(low = 0, high = 100, size = 25).reshape([5,5])

square_array[1:3,1:4]
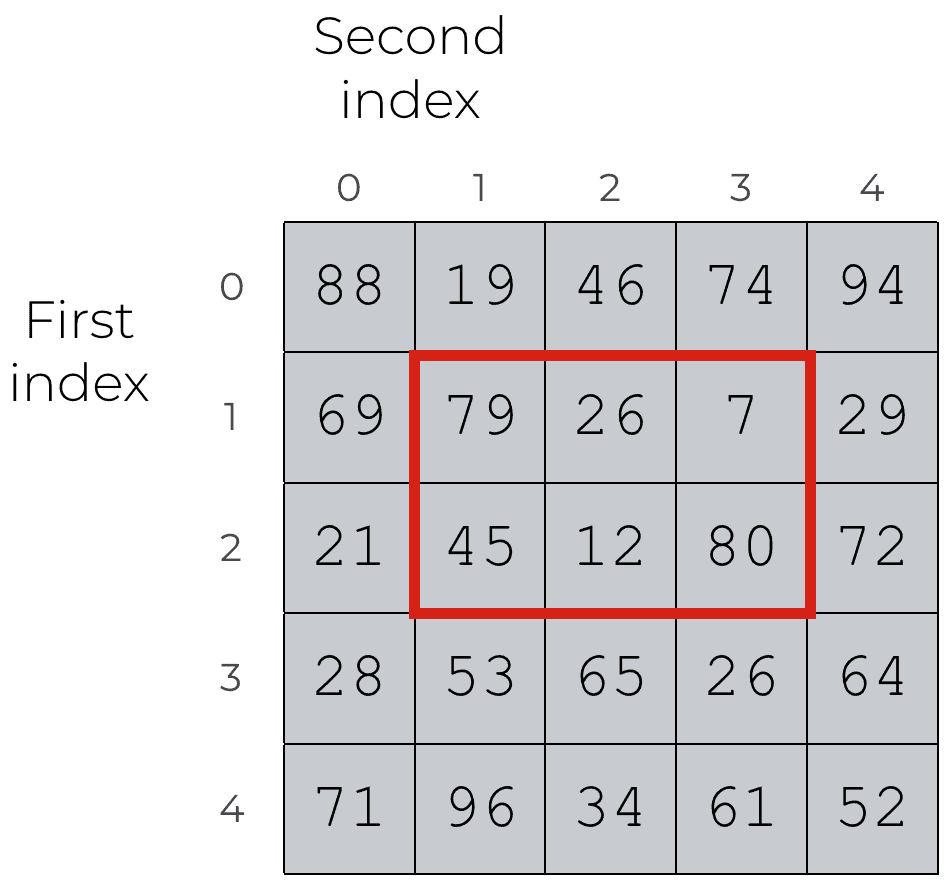
Let’s break this down.
We’ve again created a 5×5 square NumPy array called square_array.
Then, we took a slice of that array. The slice included the rows from index 1 up-to-and-excluding index 3. It also included the columns from index 1 up-to-and-excluding index 4.
This might seem a little confusing if you’re a true beginner. In that case, I recommend working with 1-d arrays first, until you get the hang of them. Then, start working with relatively small 2-d NumPy arrays until you build your intuition about indexing works with 2-d arrays.
Leave your questions in the comments below
If you’re a beginner or you don’t have a lot of experience with NumPy arrays, this might seem a little overwhelming. It’s not that complicated, but there’s a lot here and it will take a while to learn and master.
That said, I want to know if you’re still confused about something.
What questions do you still have about NumPy arrays?
Leave your questions and challenges in the comments below …
Great tutorial!
if we can read f**cking manually as the saying goes why the f**ck we need this tutorial?
It’s a joke.
Lighten up Francis.
Yeah, and I laughed out loud at that sarcasm. btw thanks for this post
You’re welcome
How do you do text?
I’m really not sure what you’re asking here.
What are you trying to do, exactly?
I think Andy wants to create an array containing a string or object??
Sweet tutorial.
So sir, I want to begin my data science journey from here, which tutorial would you recommend I start from. It must come from you though.
It depends on where you’re at currently and what your goals are.
At minimum, you need to know the essentials of Numpy, Pandas, and at least one data visualization toolkit (I currently recommend Seaborn).
To get started with Pandas, read this: A Quick Introduction to Pandas
I also recommend that you read this: The 5 Skills You Need Before You Study Machine Learning. It will give you a good overview of the skills you’ll need to build your foundation in data science.
Hi Joshua, I have just discovered your blog and the only word I can say is: amazing! I know that it has nothing to do with this article, but I was wondering why you didn’t create a better menu to navigate the blog post topic more effectively. I’ll appreciated it a lot.
Greetings from Italy!
blog article topics* (instead of ‘blog post topic’)
Thanks for the feedback …