In this tutorial, I’ll show you how to use the Numpy transpose function.
I’ll explain what the function does, how the syntax works, and I’ll show you step-by-step examples of how to use it.
If you need something specific, you can just click on any of the following links.
Table of Contents:
A Quick Introduction to Numpy Transpose
First, let’s start with a quick explanation of what Numpy transpose does.
As you’re probably aware, Numpy transpose function is a function in the Numpy package for Python.
The core data structure in Numpy is the Numpy array. A Numpy array is a row-and-column data structure that contains numbers.
Speaking generally, Numpy is a toolkit for creating arrays, but also manipulating Numpy arrays in particular ways.
That’s where Numpy transpose comes in.
Numpy Transpose Transposes Data
Numpy transpose transposes Numpy arrays.
The transpose operation actually comes from math, when we’re working with matrices. In a transpose operation, we flip a matrix around its diagonal.
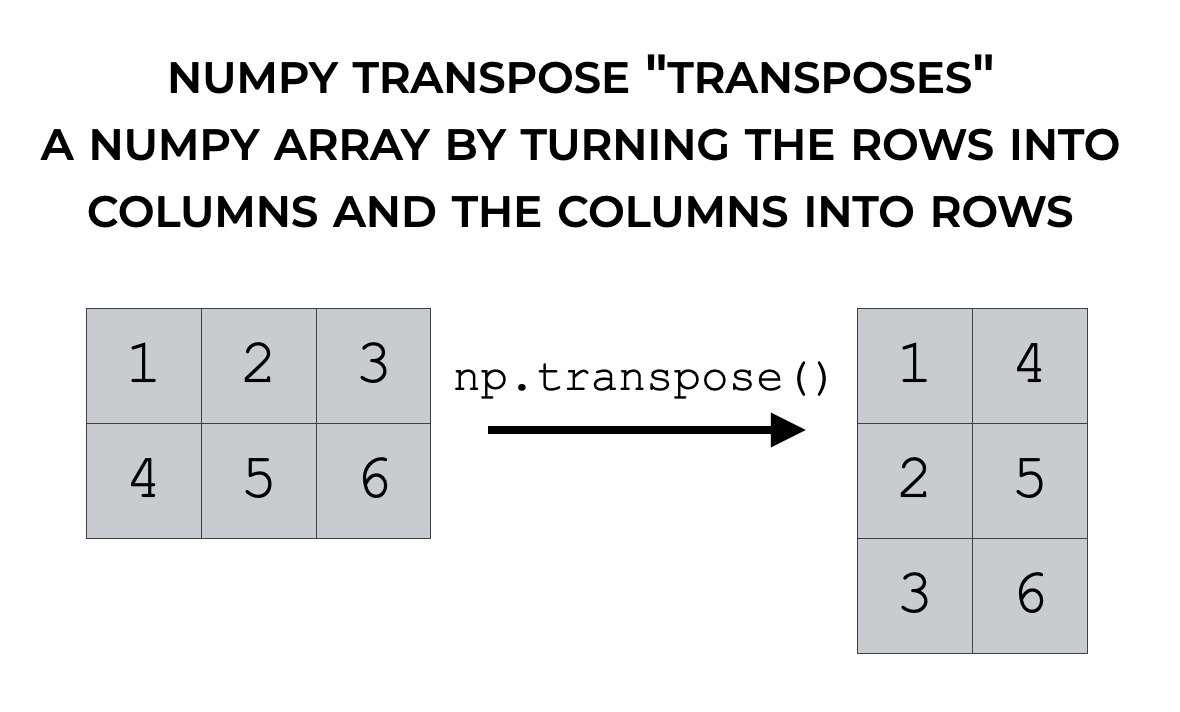
Effectively, a transpose operation switches the rows into columns, and switches the columns into rows. (At least, that’s what it does for a 2D array … it gets more complicated with higher dimensions.)
It’s actually a fairly simple function, but there are a few details of the syntax that affect how it works.
That being said, let’s look at the syntax.
The Syntax of Numpy Transpose
Here, we’re going to look at the syntax of Numpy transpose.
I’ll show you what the syntax looks like at a high level, and we’ll also discuss one of the optional parameters.
A quick note about importing Numpy
Just a reminder that when we use Numpy, we typically import it with the alias np, like this:
import numpy as np
This matters, because it changes the syntax slightly.
When we import Numpy with the alias np, it means that we can call the Numpy functions with np as a prefix.
This is the common convention among Python programmers, so I’m going to assume that you’ve imported Numpy as above, with this alias.
np.transpose syntax
The Numpy transpose function is actually fairly simple.
You call the function as np.transpose().
Inside the parenthesis, the first input is the Numpy array that you want to operate on.
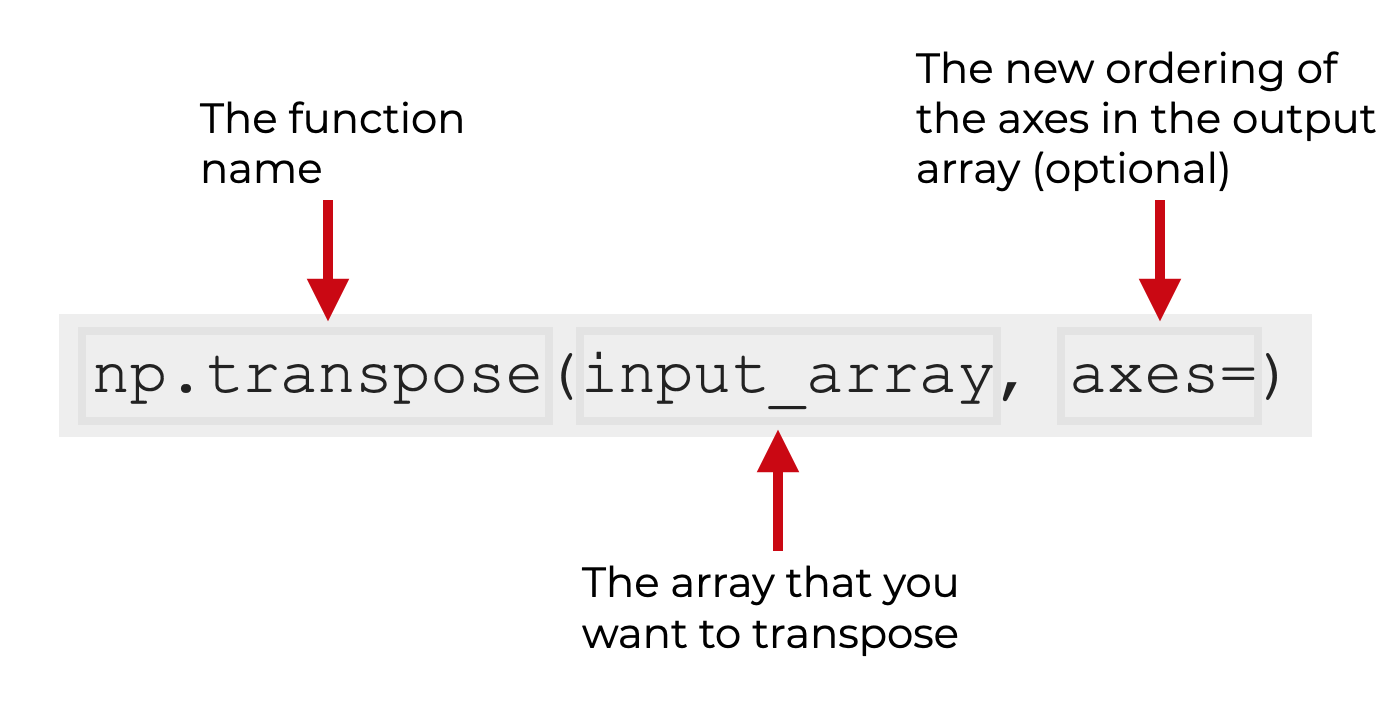
There is also an optional parameter, axes, that we can use for more advanced use cases.
Let’s take a look at these inputs and parameters.
The parameters of np.transpose
Here, we’ll look at the two inputs to the transpose function.
input_arrayaxes
input_array (required)
The “input_array” is, as you might have guessed, the array that you’re operating on.
This is required. You need to provide an array or similar object.
Having said that, in addition to Numpy arrays, this function will also accept array-like objects such as Python lists.
axes
The axes parameter enables you to specify the new ordering of the axes in the output.
Remember: when we transpose an array, we’re effectively reordering the axes of the array.
The argument to the axes parameter is a tuple or list of integers. The integers are the axis numbers, ordered according the the new axis order in the output.
Confused?
It’s OK. It’s difficult for most people to understand and conceptualize this.
That being the case, I’ll show you an example in the examples section.
The output of np.transpose
The output of the Numpy transpose function is an array with the axes permuted.
Keep in mind that np.transpose() will return a view if possible.
Examples of How to Use Numpy Transpose
Here, I’ll show you a couple of examples of how to use Numpy transpose.
Examples:
Run this code first
Just a quick reminder:
Before you run any Numpy code, you need to import Numpy.
You can import Numpy like this:
import numpy as np
Once you run that, you should be ready to go.
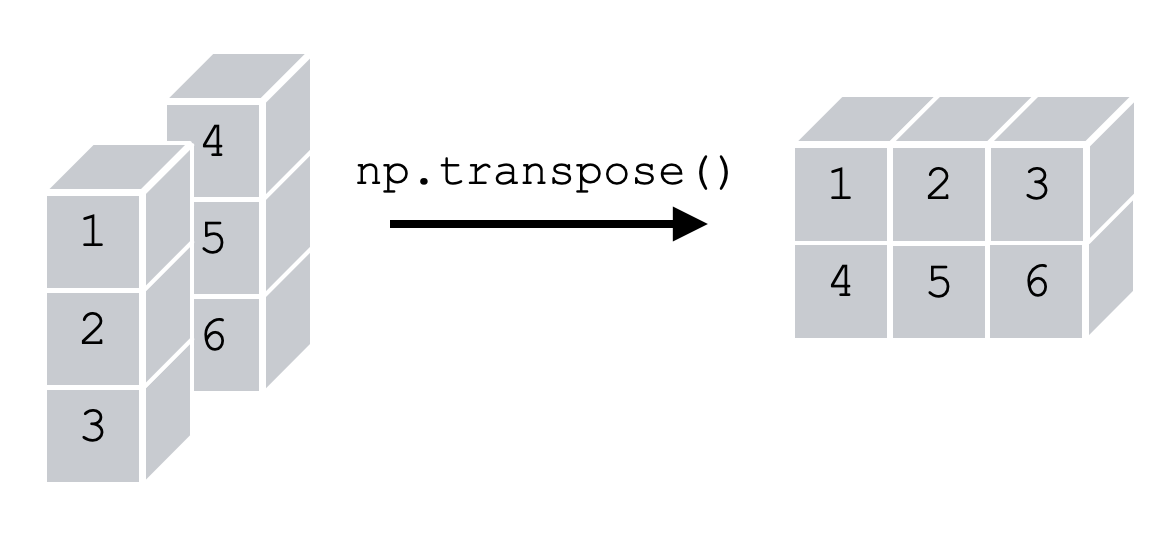
EXAMPLE 1: Transpose a 2-dimensional array
First, we’ll just transpose a simple 2-dimensional array.
Create Array
First, we need to create an array that we can operate on.
Here, I’ll use the Numpy array function to create a simple 2-dimensional array with the values from 1 to 6:
my_array = np.array([[1,2,3]
                    ,[4,5,6]])
Transpose Array
Next, we’re going to use Numpy transpose to transpose the array.
Here, we won’t use any of the optional parameters. We’ll just use the name of our array as the input.
np.transpose(my_array)
OUT:
array([[1, 4],
       [2, 5],
       [3, 6]])
Explanation
So what happened here?
This is pretty simple.
Numpy transpose transposed the array around the diagonal.
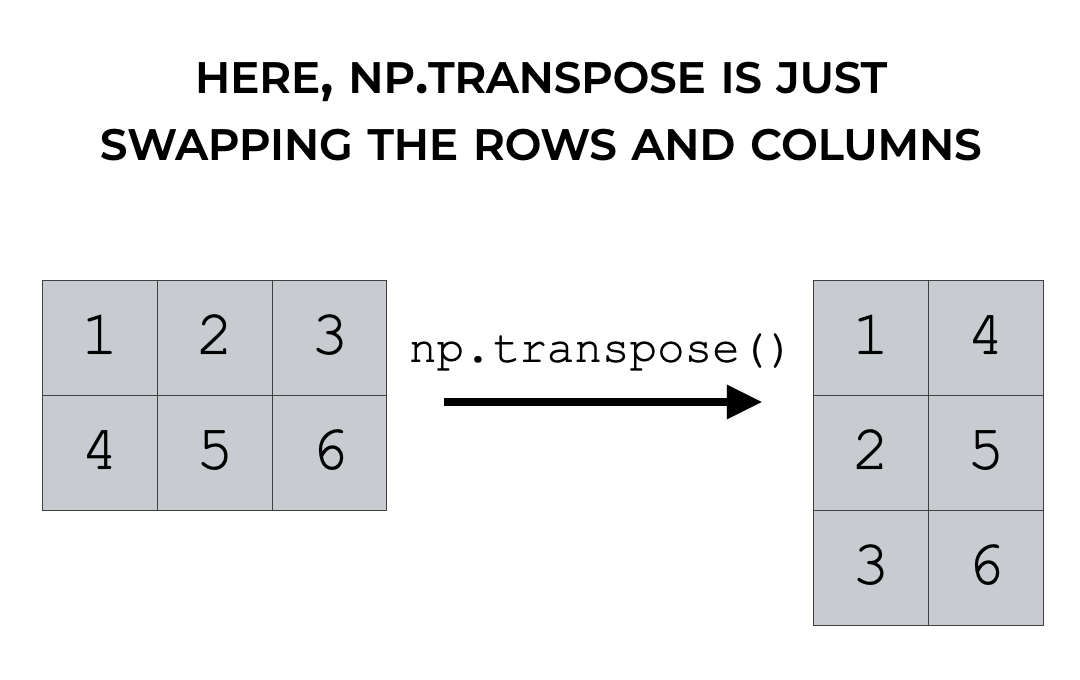
Effectively, for a 2D array, this just turns the rows into columns and the columns into rows.
EXAMPLE 2: Transpose an array while explicitly using the axes parameter
Now, in this example, we’re going to do something slightly more complicated.
Here, we’re going to transpose a 3-dimensional array.
And in doing this, we’re going to explicitly use the axes parameter to specify how we want to restructure and reorder the axes.
Create array
First, we need to create an array that we can work with.
Here, we’re going to use the Numpy array function again to create a 3D array:
my_array_3d = np.array([[[1]
                         ,[2]
                         ,[3]]
                        ,[[4]
                         ,[5]
                         ,[6]]])
And let’s print it out so you can see it:
print(my_array_3d)
OUT:
[[[ 1]
  [ 2]
  [ 3]]

 [[4]
  [5]
  [6]]]
If you look carefully, this array has 3 dimensions: 2 “layers” (along axis-0), 3 rows (along axis-1), and 1 column (along axis-2).
Transpose array
Now, we’ll transpose the array.
Here, we’re going to use np.transpose with the
np.transpose(my_array_3d, axes = [2,0,1])
OUT:
array([[[1, 2, 3],
             [4, 5, 6]]])
Explanation
This is a little difficult to understand, so it might help to visualize it.
Remember, the original array had 2 layers, 3 rows, and 1 column:
- The layers are along axis-0
- The rows are along axis-1
- The columns are along axis-2
Ok. Now, let’s go back to the code that we used.
We transposed the array with the code np.transpose(my_array_3d, axes = [2,0,1]). Notice that here, we’re using the axes parameter, and we’re specifying that in the output, we want to the axes to be reordered with the order [2,0,1].
Ultimately, this is permuting the axes as follows:
- turns the columns of the original array into the new layers (axis-2 becomes axis-0)
- turns the layers of the original array into the rows (axis-0 becomes axis-1)
- turns the rows of the original array into the columns (axis-1 becomes axis-2)
This code effectively reorders the axes and restructures the data contained along those axes according to the rules described in the above bullets.
One thing to keep in mind, however, is that the output is still technically 3-dimensional … it just has 1 unit along the axis-0 dimension.
Leave your other questions in the comments below
Do you still have questions about Numpy transpose?
If so, leave your questions in the comments section at the bottom of the page.
For more tutorials, sign up for our email list
This tutorial should have helped you understand Numpy transpose.
But if you want to really learn how to do data wrangling and data science in Python, there’s a lot more to learn.
If you’re ready to learn the full range of Python data science skills, then sign up for our free email list.
When you sign up, you’ll get free tutorials on:
- NumPy
- Pandas
- Base Python
- Scikit learn
- Machine learning
- Deep learning
- … and more.
Members of our email list get our free tutorials delivered to their inbox, FREE, several times per month.
Awesome
????